
I Heart Sketches

I love sketches! 
Seriously!  I use them for about 75% of my layouts (the other 25% are scraplifted from someone else's design- which was probably based on a sketch too).  I might be lost without sketches!!!!

A LONG time ago, I was scrapping and some friends asked me how I was able to sit down and get 5+ layouts done in one night.  SKETCHES!   Here's what I do.....
1- pick out my pictures
2- match up a sketch (based on # of pictures and orientation)
3- pick out my papers---- it really helps if I'm using a kit or have coordinating papers from a specific company
4- cut, assemble and add embellishments

Some of my all time favorite sketch sources are:
CTMH's How To Books---- my new fave is MAGIC
Page Maps
Shanna's Sketches
and
Sassy Lil Sketches
oh yeah--- did you know that I also draw sketches???  You can see them labeled on the LEFT side of my blog or:
1 Photo
2 Photo
3 Photo
4 Photo
5+ Photo

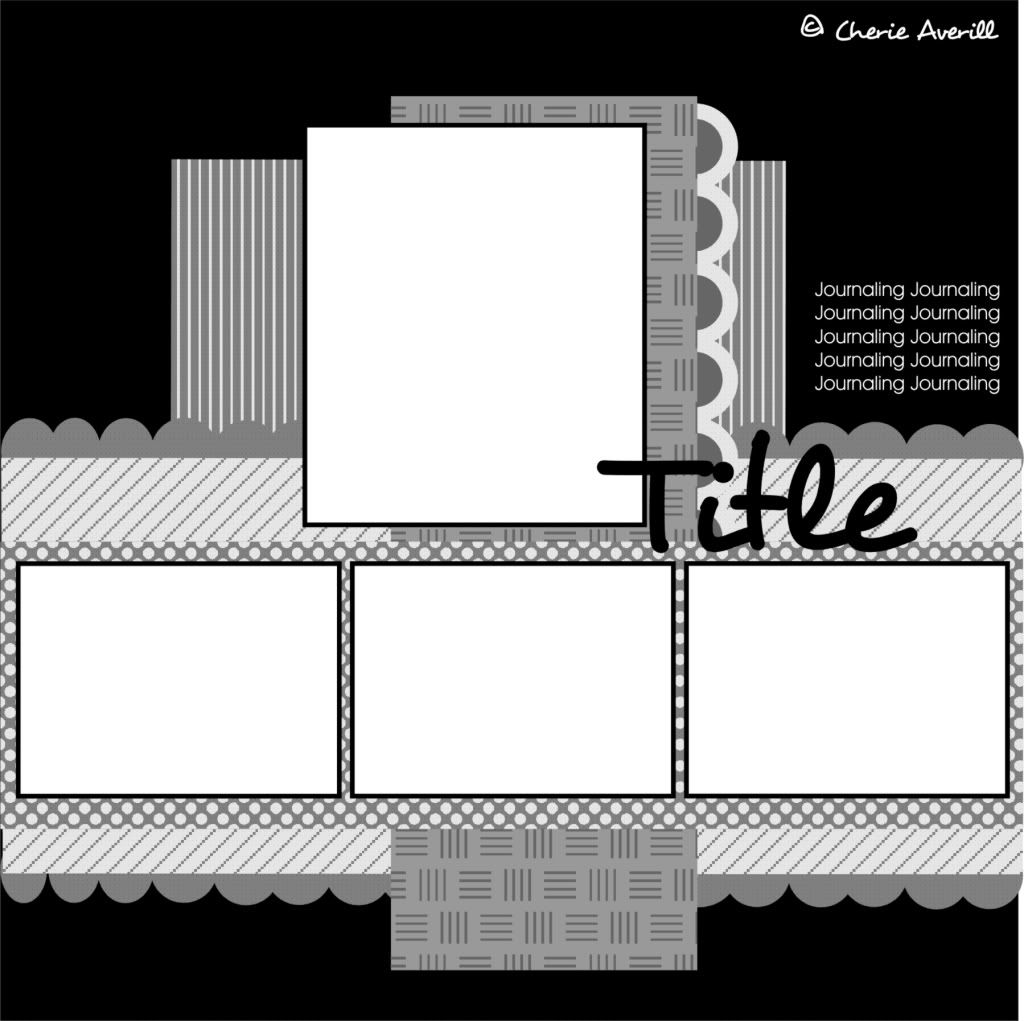
Tonight's layouts are from Sassy Lil Sketches:

and


So how long did these take me?????  LESS than ONE HOUR------- for BOTH!  Not kidding!

Comments

Katie said…
less than one hour for those cute pages? how awesome! thanks for using sassy lil' sketches! can't wait to see more of your work in the future.

Popular posts from this blog

Getting Started with Scrapbooking: Stop Waiting & Start Creating

 Are you looking for somewhere to start? Do you feel like you’re so far behind you’ll never catch up? Here’s your solution: just get started. Scrapbooking doesn’t have to feel overwhelming or complicated. You don’t need years of photos perfectly organized, or hours of free time every week. You simply need to pick one event , choose a handful of your favorite photos , grab a Stampin’ Up! Scrapbooking Workshop Kit , and… START! Why Workshop Kits Make It Easy Stampin’ Up! Scrapbooking Workshop Kits are the perfect way to dive in, whether you’re brand new to scrapbooking or just trying to find your groove again. Each kit includes everything you need to complete three beautifully designed 2-page layouts . All the papers, embellishments, titles, and instructions are ready for you—you just add your photos and personal touches. No Stress. No Guesswork. Instead of wondering where to begin, the kit guides you step by step so you can spend less time planning and more time creating. Whe...

My Favorite Crafty Items

Photo Printing Must Haves: Epson PictureMate PM https://amzn.to/3J5oQxP Epson 320 Ink https://amzn.to/4mgOUos Canon 5x7 Photo Paper https://amzn.to/3Hs82QV Epson 4x6 High Gloss Photo Paper https://amzn.to/4oqq8U2 4x6 Matte Photo Paper https://amzn.to/4loHXAm Organization: Magnetic Sheets with envelopes https://amzn.to/4mCS0Tq 12x12 Paper Storage Sleeves https://amzn.to/3HpY8PS Photo Storage Box- store photos, embellishments and more https://amzn.to/4fCxVKI 7x7 Clear Plastic storage (for 6x6 paper packs) https://amzn.to/3HpYg1O 13x13 Clear Plastic storage (for 12x12 paper packs) https://amzn.to/3J6eFc7 Lighting: Bemelux Desk Lamp https://amzn.to/40TWoF9 OttLite Desk Lamp https://amzn.to/45pATgF Desk Lamp: https://amzn.to/3HqllBl Adhesives: ATG refils: https://amzn.to/46JQPNe Envelopes for cards: A2 standard size: https://amzn.to/3J6eJbR Cricut Accessories: 12x12 Mats https://amzn.to/46KFtIV https://amzn.to/45o4l6S Mats for Cricut Joy https://amzn.to/3J1Ivid 12x24 mats https://amzn.to/40...

~*~ Holiday Blog Hop ~*~

Welcome to the Paper Secrets Holiday Blog Hop. I made a couple of things to share with you today. I created this lovely paper tree by punching a LOT of 1 1/4" circles of Mistletoe Paper, then used pearl floral pins to secure them in rows to a styrofoam cone.  As I neared the top, I had to use some adhesive so that they did not flare out, but sit in the cone shape.  At the top, I stamped 3 stars and adhered them to the top of the cone.  Supplies: Styrofoam cone Pearl Floral Pins CTMH Mistletoe level 2 paper CTMH Mistletoe Creative Basics paper D1320 Shining Star Stamps I created a second paper tree using instructions from Tracey Mason .  I created an accordion flower with a stamped sentiment for my topper on this one.   Supplies: Styrofoam Cone CTMH Mistletoe Level 2 papers K& Co paper D1380 Just for the Holidays Stamps I created a total of four paper trees to sit upon my mantel!  The "subway art" was a free printable from eighteen25 ....